|
How To Print
Block-Printing Method
For
small stamps I just tamp the stamp onto a conventional ink pad. You
don't really need to mount even the .25-inch-thick material, but you can
always glue smaller stamps to a piece of wood or acrylic if you feel you
need greater control.
I use
a traditional block printing technique when I print my larger
hand-carved stamps. This technique also works for commercially produced
large, detailed stamps, such as those by Magenta. It provides greater
coverage and control than the regular "stamp-pad-on-top"
process.
Supplies
-
Glass
plate (a piece of glass from an 8 x 10 picture frame is ideal)
-
Old
telephone book (this provides padding and also protects your work
surface)
-
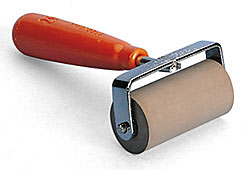
Soft
rubber brayer (it is good to have several widths on hand, depending
on the size of your stamp) (photo below)
The
Process
-
On
your work surface place the opened telephone book next to the glass
plate.
-
Lay
your carved stamp face up on the telephone book.
-
Squeeze
or place a thin line of ink horizontally across the top of the glass
plate, about the width of the brayer roller.
-
Dip
the brayer roller into the line of ink and begin rolling upwards on
the glass plate in even strokes, making certain not to touch the
link of ink. Roll in one direction only.
-
Roll
until the layer of ink on the glass is thin and even and you hear a
"snapping" sound.
-
Roll
the ink onto the stamp, making sure to completely cover the image
with a thin layer of ink. Lay the brayer aside.
-
Carefully
lay the paper on top of the inked stamp and gently press down with
your hand. This will "stick" the paper to the stamp (the
ink is sticky) and will prevent it from shifting.
-
Use
the back of the wooden spoon, or the baren, to provide even pressure
to the back of the paper, making sure to cover the entire image
area. Work from the center of the paper to the edges in a sunburst
pattern. You can carefully lift a corner of the paper to see the
quality of the print.
-
When
you are done, carefully lift the paper from the stamp from one
corner.
-
Allow
the print to dry, or apply embossing powder and heat emboss.
-
Use
up the remaining ink on the glass plate by making more prints of the
same or other stamps. Re-ink the brayer roller as needed.
-
Make
sure to sign your work with your signature and the date, and if you
are printing an edition (many prints at one time), number each print
as "xx/yy," where "xx" is
the number of the individual print, and "yy" is the
total number of prints in that edition.
I
guarantee that if you try this a few times you will quickly master the
technique and will love it!
|